
你想过 Gmeet、MS Teams 或 Zoom 等日常聊天应用程序是如何工作的吗?现在,在本文中,你将了解它的工作原理,并使用 WebRTC 创建你的视频聊天应用程序。
WebRTC是使用 Web 浏览器直接驱动实时通信(语音、视频和任意数据)的方法。使用 WebRTC ,人们可以创建媒体应用程序,而无需担心其底层的复杂网络。

WebRTC 是如何工作的?
让我们从客户端和服务器连接开始。一般来说,客户端向服务器请求数据,然后服务器将数据作为响应发送回来。WebSockets 也是如此;如果我想给我的朋友发送一条信息,那么信息需要通过服务器从那里发送给我的朋友。
WebRTC 则不同,我们可以在两个浏览器之间直接发送信息,而服务器无需接触信息。因此,WebRTC 被称为点对点技术,简称 P2P,浏览器之间可以直接通信。
关于WebRTC 的基础知识有非常多的资料,这里不再详细介绍。现在我们开始使用 WebRTC 构建一个简单的视频聊天应用程序。
创建视频聊天应用程序
为了创建此应用程序,我们将使用 HTML、CSS、javascript、WebRTC 和 Firebase 来存储数据。
项目设置
首先,从初始化项目开始,使用 npm 来安装一个 firebase。
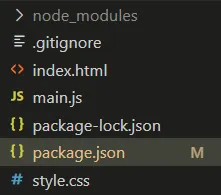
npm i firebase该项目的文件结构是:
让我们从 HTML 和 CSS 开始吧!
对于简单的视频聊天应用程序,我们需要一些东西:
- 本地(网络摄像头)视频和来电视频的视频元素。
- 用于发起、应答和结束呼叫的按钮。
- 用于从用户端访问音频和视频的按钮。
- 输入元素,用于输入视频通话邀请键。
HTML 代码示例如下:
<!DOCTYPE html>
	<html lang="en">
	<head>
	<meta charset="UTF-8" />
	<link rel="icon" type="image/svg+xml" href="favicon.svg" />
	<meta name="viewport" content="width=device-width, initial-scale=1.0" />
	<title>WebRTC</title>
	</head>
	<body>
	<h2>1. Start your Webcam</h2>
	<div class="videos">
	<span>
	<h3>Local Stream</h3>
	<video id="webcamVideo" autoplay playsinline></video>
	</span>
	<span>
	<h3>Remote Stream</h3>
	<video id="remoteVideo" autoplay playsinline></video>
	</span>


	</div>

	<button id="webcamButton">Start webcam</button>
	<h2>2. Create a new Call</h2>
	<button id="callButton" disabled>Create Call (offer)</button>

	<h2>3. Join a Call</h2>
	<p>Answer the call from a different browser window or device</p>

	<input id="callInput" />
	<button id="answerButton" disabled>Answer</button>

	<h2>4. Hangup</h2>

	<button id="hangupButton" disabled>Hangup</button>

	<!-- script for webrtc -->
	<script type="module" src="/main.js"></script>

	</body>
	</html>
当我们设置 HTML 文件时,我们可以使用 CSS 进行一些基本的样式设置。
body {
	font-family: sans-serif;
	-webkit-font-smoothing: antialiased;
	-moz-osx-font-smoothing: grayscale;
	text-align: center;
	color: #2c3e50;
	margin: 80px 10px;
	}

	video {
	width: 40vw;
	height: 30vw;
	margin: 2rem;
	background: rgb(44, 62, 80);
	}

	.videos {
	display: flex;
	align-items: center;
	justify-content: center;
	}
现在项目的前端部分已经完成。你还可以使用前端框架和库,例如React、Vue、Angular等。
现在可直接跳到 javascript 部分。javascript 部分将由以下部分组成:
- 导入firebase、firestore并初始化 firestore。
- 创建一个 Firestore 实例。
- 设置服务器配置和一些全局状态。
- 导入DOM元素。
- 为各种事件添加事件侦听器。
要初始化 Firebase,请在 Firebase 中创建一个项目并选择该项目中的 Web 应用程序。然后转到项目设置,在那里你可以看到你的 firebase 配置,如下:
const firebaseConfig = {
	apiKey: // your api key,
	authDomain: // your authDomain,
	projectId: // your projectId,
	storageBucket: // your storageBucket,
	messagingSenderId: // your messagingSenderId,
	appId: // your appId
	};
获取firebase配置后,导入并初始化firebase。
 	import './style.css';
	import firebase from 'firebase/app'
	import 'firebase/firestore'
	import { initializeApp } from "firebase/app";

	const firebaseConfig = {
	// your config
	};

	// Initialize Firebase
	initializeApp(firebaseConfig);
开始创建一个firebase实例:
 // firestore instance
 const firestore = firebase.firestore();
添加 STUN 服务器,通过它传输数据,可以用谷歌的免费iceServers。然后初始化PeerConnection并将本地流和远程流设置为 null。
// server config
	const servers = {
	iceServers: [
	{
	urls: ['stun:stun1.l.google.com:19302', 'stun:stun2.l.google.com:19302'], // free stun server
	},
	],
	iceCandidatePoolSize: 10,
	};

	// global states
	const pc = new RTCPeerConnection(servers);
	let localStream = null;
	let remoteStream = null
可以使用 DOM 访问 HTML 中的所有元素。
// importing dom elements
	const webcamButton = document.querySelector('#webcamButton');
	const webcamVideo = document.querySelector('#webcamVideo');
	const callButton = document.querySelector('#callButton');
	const callInput = document.querySelector('#callInput');
	const answerButton = document.querySelector('#answerButton');
	const remoteVideo = document.querySelector('#remoteVideo');
	const hangupButton = document.querySelector('#hangupButton');
现在,让我们为 webcamButton 添加一个事件监听器,以启用来自设备的音频和视频。为此,我们有一个名为 navigator 的内置方法。然后,将远程流设置为 MediaStream 实例,并将本地流中的音轨推送到 peerConnection,因为我们需要在通话时将这些数据发送到其他设备。然后,我们将本地流和远程流分别设置为 webcamVideo 和 remoteVideo。最后,禁用 webcamButton 并启用 callButton 和 answerButton。
webcamButton.onclick = async () => {

	// setting local stream to the video from our camera
	localStream = await navigator.mediaDevices.getUserMedia({
	video: true,
	audio: true
	})

	// initalizing the remote server to the mediastream
	remoteStream = new MediaStream();


	// Pushing tracks from local stream to peerConnection
	localStream.getTracks().forEach(track => {
	pc.addTrack(track, localStream);
	})

	pc.ontrack = event => {
	event.streams[0].getTracks(track => {
	remoteStream.addTrack(track)
	})
	}

	// displaying the video data from the stream to the webpage
	webcamVideo.srcObject = localStream;
	remoteVideo.srcObject = remoteStream;

	// enabling and disabling interface based on the current condtion
	callButton.disabled = false;
	answerButton.disabled = false;
	webcamButton.disabled = true;
	}
现在我们需要向 callButton 添加事件监听器来发起呼叫。首先,我们需要引用 firestore 中的集合。CallDoc是主集合,offerCandidates和answerCandidates是callDoc下的子集合。现在需要生成一个callId。我们可以使用callDoc Id 作为callId。通常,如果集合没有 id,firestore 在调用时会自动为其提供 id。现在我们有了 callId,我们可以开始创建报价了。
为了创建要约,我们使用createOffer(),然后将要约设置为对等连接作为本地描述。然后创建一个 Offer 对象,并将其设置为callDoc。完成后,peerConnection开始获取iceCandidates ,我们在侦听onicecandidate事件侦听器时将其存储在 firestore 中。存储在 firestore 中的数据将用于将数据发送到远程流。
现在,我们设置了一个报价并将数据存储在firestore中。在流式传输时,存储在firestore中的数据不断变化。因此,为了更新流,我们使用 onSnapshot ()获取每个快照中的数据,并使用setRemoteDescription()方法更新远程描述。最后,我们启用挂断按钮来结束通话。
callButton.onclick = async () => {

	// referencing firebase collections
	const callDoc = firestore.collection('calls').doc();
	const offerCandidates = callDoc.collection('offerCandidates');
	const answerCandidiates = callDoc.collection('answerCandidates');

	// setting the input value to the calldoc id
	callInput.value = callDoc.id;

	// get candidiates for caller and save to db
	pc.onicecandidate = event => {
	event.candidate && offerCandidates.add(event.candidate.toJSON());
	}

	// create offer
	const offerDescription = await pc.createOffer();
	await pc.setLocalDescription(offerDescription);

	// config for offer
	const offer = {
	sdp: offerDescription.sdp,
	type: offerDescription.type
	}

	await callDoc.set({offer});


	// listening to changes in firestore and update the streams accordingly

	callDoc.onSnapshot(snapshot => {
	const data = snapshot.data();

	if (!pc.currentRemoteDescription && data.answer) {
	const answerDescription = new RTCSessionDescription(data.answer);
	pc.setRemoteDescription(answerDescription);
	}

	// if answered add candidates to peer connection
	answerCandidiates.onSnapshot(snapshot => {
	snapshot.docChanges().forEach(change => {

	if (change.type === 'added') {
	const candidate = new RTCIceCandidate(change.doc.data());
	pc.addIceCandidate(candidate);
	}
	})
	})
	})

	hangupButton.disabled = false;

	}
为了应答发起的呼叫,我们需要向应答按钮添加一个事件监听器。AnswerButton 的工作方式与callButton类似。
- 首先,获取发起呼叫的CallId 。
- 使用 callId从firestore获取该特定调用的数据。
- 得到answerCandidates和offerCandidates子集合。我们从CallDoc Data 中获取callData。
- 将callData.offer设置为offerDescription ,并使用offerDescription设置remoteDescription ,并使用answerDescription设置localDescription。
现在类似于Offer,我们使用相同的配置创建答案并用它更新callDoc 。完成后,peerConnection开始获取iceCandidates,我们可以使用onicecandidate事件侦听器来更新firestore中answerCandidates集合中的相同内容。
最后,为了接收传入的视频呼叫,我们使用 onSnapshot (),它通过每次在Firestore中添加数据时创建一个新的RTCIceCandidate实例来更新每个快照的对等连接。
answerButton.onclick = async () => {
	const callId = callInput.value;

	// getting the data for this particular call
	const callDoc = firestore.collection('calls').doc(callId);

	const answerCandidates = callDoc.collection('answerCandidates');
	const offerCandidates = callDoc.collection('offerCandidates');

	// here we listen to the changes and add it to the answerCandidates
	pc.onicecandidate = event => {
	event.candidate && answerCandidates.add(event.candidate.toJSON());

	}

	const callData = (await callDoc.get()).data();

	// setting the remote video with offerDescription
	const offerDescription = callData.offer;
	await pc.setRemoteDescription(new RTCSessionDescription(offerDescription));


	// setting the local video as the answer
	const answerDescription = await pc.createAnswer();
	await pc.setLocalDescription(new RTCSessionDescription(answerDescription));

	// answer config
	const answer = {
	type: answerDescription.type,
	sdp: answerDescription.sdp
	}

	await callDoc.update({ answer });

	offerCandidates.onSnapshot(snapshot => {
	snapshot.docChanges().forEach(change => {

	if (change.type === 'added') {
	let data = change.doc.data();
	pc.addIceCandidate(new RTCIceCandidate(data));

	}
	})
	})
	}
结论
以上就是使用 WebRTC 创建基本视频聊天应用程序的全部内容!
WebRTC 仍在增长。据估计,Chrome 浏览器用户每周使用 WebRTC 进行超过 15 亿分钟的音频/视频通话,并用于 google meet、Facebook Messenger、discord、amazon chime 等流行应用程序。
本文来自作者投稿,版权归原作者所有。如需转载,请注明出处:https://www.nxrte.com/jishu/webrtc/30576.html