
随着技术的飞速发展,生成式人工智能一直是科技界的热门话题。长期以来,谷歌一直走在人工智能的前沿,谷歌的研究人员开发了最新的生成式人工智能模型背后的技术,并在他们的论文《Attention Is All You Need》中进行了概述。去年,谷歌开发并发布了多种模型和服务,如 Bard、Palm 和最新的 Gemini 及其开源变体 Gemma。Gemini 拥有慷慨的免费层级,每分钟 60 次请求(注意,他们会保留您的输入数据以训练其模型),这对新应用程序非常有用。如今,许多人利用移动设备来满足他们的大量计算需求,因此我们将探讨如何将 Gemini API 集成到 Expo React Native 移动聊天应用程序中。
本文中引用的完整源代码可在 GitHub 上找到:https://github.com/dpills/aitomobile
在开始之前,请先在 Google AI Studio 中生成 Gemini API 密钥。
后台
我们需要一个后端服务来调用 Gemini API,因此我们可以使用 FastAPI WebSocket 设置来实现这一点。安装 FastAPI 依赖项和 Google Generative AI 库。
- pyproject.toml
[tool.poetry]
name = "aitomobile"
version = "0.1.0"
description = ""
authors = ["dpills"]

[tool.poetry.dependencies]
python = "^3.12"
fastapi = "^0.110.0"
uvicorn = { extras = ["standard"], version = "^0.28.0" }
python-dotenv = "^1.0.1"
google-generativeai = "0.4.1"

[build-system]
requires = ["poetry-core"]
build-backend = "poetry.core.masonry.api"
将生成的 Gemini API 密钥添加到项目文件夹中的 .env 文件:
GOOGLE_API_KEY=XXXXXXXXXXXXX现在设置 FastAPI WebSocket 服务器以接受信息,将其发送到 Gemini API,并通过 WebSocket 将响应流传回。您可以根据需要更新提示信息,并测试不同的提示信息,看看哪种提示信息的输出效果最好。更多信息请参考 Google AI 文档中的 “提示策略 “部分。
- main.py
import json
import os
import uuid
from typing import AsyncGenerator, NoReturn

import google.generativeai as genai
import uvicorn
from dotenv import load_dotenv
from fastapi import FastAPI, WebSocket

load_dotenv()

genai.configure(api_key=os.getenv("GOOGLE_API_KEY"))
model = genai.GenerativeModel("gemini-pro")

app = FastAPI()

PROMPT = """
You are a helpful assistant, skilled in explaining complex concepts in simple terms.

{message}
"""  # noqa: E501

async def get_ai_response(message: str) -> AsyncGenerator[str, None]:
    """
    Gemini Response
    """
    response = await model.generate_content_async(
        PROMPT.format(message=message), stream=True
    )

    msg_id = str(uuid.uuid4())
    all_text = ""
    async for chunk in response:
        if chunk.candidates:
            for part in chunk.candidates[0].content.parts:
                all_text += part.text
                yield json.dumps({"id": msg_id, "text": all_text})

@app.websocket("/ws")
async def websocket_endpoint(websocket: WebSocket) -> NoReturn:
    """
    Websocket for AI responses
    """
    await websocket.accept()
    while True:
        message = await websocket.receive_text()
        async for text in get_ai_response(message):
            await websocket.send_text(text)

if __name__ == "__main__":
    uvicorn.run(
        "main:app",
        host="0.0.0.0",
        port=8000,
        log_level="debug",
        reload=True,
    )
这就是全部内容!现在启动服务器,这样就可以从应用程序连接到服务器。
$ python3 main.py

INFO:     Uvicorn running on http://0.0.0.0:8000 (Press CTRL+C to quit)
INFO:     Started reloader process [65258] using WatchFiles
INFO:     Started server process [65260]
INFO:     Waiting for application startup.
INFO:     Application startup complete.
Mobile App
如前所述,我们将使用 Expo 创建 React Native 移动应用程序,您可以使用 create-expo-app 工具来引导 Typescript 版本。
$ yarn dlx create-expo-app -t expo-template-blank-typescript

✔ What is your app named? … AItoMobile
✔ Downloaded and extracted project files.
> yarn install

✅ Your project is ready!

To run your project, navigate to the directory and run one of the following yarn commands.

- cd AItoMobile
- yarn android
- yarn ios
- yarn web
使用 expo install 将确保使用与当前 expo 版本兼容的版本。
$ npx expo install react-native-gifted-chat react-native-markdown-display luxon @react-native-async-storage/async-storage将 App.tsx 文件更新为基本的聊天设置,该设置将 WebSocket 连接到我们的后端,持续显示之前的消息并渲染 Markdown 响应。
import AsyncStorage from "@react-native-async-storage/async-storage"
import { StatusBar } from "expo-status-bar"
import { DateTime } from "luxon"
import React, { useEffect, useState } from "react"
import { Text, TextStyle, View, ViewStyle } from "react-native"
import { GiftedChat, IMessage } from "react-native-gifted-chat"
import Markdown from "react-native-markdown-display"

export default function App() {
  const [messages, setMessages] = useState<IMessage[]>([])
  const [loading, setLoading] = useState(false)
  const [ws, setWs] = useState<WebSocket>()

  useEffect(() => {
    const newWs = new WebSocket("ws://localhost:8000/ws")

    newWs.onmessage = (event) => {
      const data = JSON.parse(event.data)
      setLoading(false)
      setMessages((previousMessages) =>
        GiftedChat.append(
          previousMessages.filter((m) => m._id !== data.id),
          [
            {
              _id: data.id,
              text: data.text,
              createdAt: new Date(),
              user: { _id: 1 },
              system: true,
            },
          ],
        ),
      )
    }

    async function getMessages() {
      const messageData = await AsyncStorage.getItem("messages")
      const messages: IMessage[] | null = messageData ? JSON.parse(messageData) : null

      setMessages(
        messages
          ? messages
          : [
              {
                _id: 1,
                text: "How can I help?",
                createdAt: new Date(),
                user: { _id: 1 },
                system: true,
              },
            ],
      )
    }

    getMessages()
    setWs(newWs)
    return () => {
      newWs.close()
    }
  }, [])

  useEffect(() => {
    async function saveMessages() {
      try {
        await AsyncStorage.setItem("messages", JSON.stringify(messages))
      } catch (e) {
        console.log(`Failed to save messages: ${e}`)
      }
    }

    saveMessages()
  }, [messages])

  return (
    <View style={$container}>
      <StatusBar style="auto" />
      <GiftedChat
        placeholder="How can I help?"
        messages={messages}
        onSend={(messages) => {
          if (ws && messages && messages.length > 0) {
            const message = messages[0]
            setMessages((previousMessages) => GiftedChat.append(previousMessages, messages))
            setLoading(true)
            ws.send(message.text)
          }
        }}
        user={{ _id: 2 }}
        renderAvatar={null}
        isTyping={loading}
        renderSystemMessage={(props) =>
          props.currentMessage?.text ? (
            <View style={$msgContainer}>
              <View style={$wrapper}>
                <Markdown
                  style={{
                    body: {
                      fontSize: 16,
                    },
                  }}
                >
                  {props.currentMessage?.text}
                </Markdown>
                {props.currentMessage?.createdAt ? (
                  <Text style={$msgTime}>
                    {DateTime.fromJSDate(new Date(props.currentMessage?.createdAt)).toFormat(
                      "h:mm a",
                    )}
                  </Text>
                ) : null}
              </View>
            </View>
          ) : null
        }
      />
    </View>
  )
}

const $container: ViewStyle = {
  flex: 1,
  paddingBottom: 20,
  paddingTop: 60,
}

const $msgContainer: ViewStyle = {
  flex: 1,
  marginTop: 5,
  marginBottom: 10,
  marginHorizontal: 10,
}

const $wrapper: ViewStyle = {
  borderRadius: 15,
  backgroundColor: "#f0f0f0",
  marginRight: 25,
  paddingHorizontal: 10,
  paddingBottom: 5,
  minHeight: 20,
  justifyContent: "flex-start",
}

const $msgTime: TextStyle = {
  fontSize: 10,
  marginTop: 5,
}
确保你已用 XCode 或 Android Studio 安装了 IOS 或 Android 模拟器,并启动了移动应用开发服务器。
$ yarn ios

Starting Metro Bundler
› Opening exp://192.168.50.102:8081 on iPhone 15 Pro
...
› Metro waiting on exp://192.168.50.102:8081
› Scan the QR code above with Expo Go (Android) or the Camera app (iOS)

› Using Expo Go
› Press s │ switch to development build

› Press a │ open Android
› Press i │ open iOS simulator
› Press w │ open web

› Press j │ open debugger
› Press r │ reload app
› Press m │ toggle menu
› Press o │ open project code in your editor

› Press ? │ show all commands

Logs for your project will appear below. Press Ctrl+C to exit.
iOS Bundled 1375ms (node_modules/expo/AppEntry.js)
现在您应该可以在 Expo Go 中看到聊天界面,并可以测试一个问题!
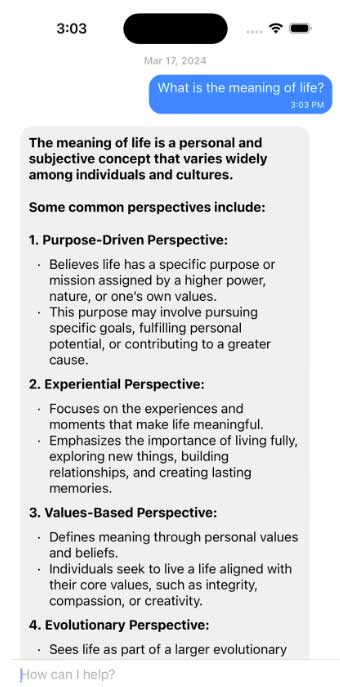

响应信息将对更新进行流式处理,我们的后台开发服务器日志应显示客户端连接、所提问题和发回的响应块。
DEBUG:    = connection is CONNECTING
DEBUG:    < GET /ws HTTP/1.1
DEBUG:    < host: localhost:8000
DEBUG:    < sec-websocket-version: 13
DEBUG:    < upgrade: websocket
DEBUG:    < sec-websocket-key: UzwxQuxXmRR1K/lT6sPYxw==
DEBUG:    < connection: Upgrade
DEBUG:    < origin: http://localhost:8000

INFO:     ('127.0.0.1', 64657) - "WebSocket /ws" [accepted]
DEBUG:    > HTTP/1.1 101 Switching Protocols
DEBUG:    > Upgrade: websocket
DEBUG:    > Connection: Upgrade
DEBUG:    > Sec-WebSocket-Accept: uHRvWGNZ/CCWmy80rcxRax6Fipc=
DEBUG:    > date: Sun, 17 Mar 2024 19:02:52 GMT
DEBUG:    > server: uvicorn

INFO:     connection open
DEBUG:    = connection is OPEN
DEBUG:    < TEXT 'What is the meaning of life?' [28 bytes]
DEBUG:    > TEXT '{"id": "db926495-f85d-40cf-a901-bf92cb953ee7", ...ely among individuals"}' [153 bytes]
DEBUG:    > TEXT '{"id": "db926495-f85d-40cf-a901-bf92cb953ee7", ...r mission assigned by"}' [311 bytes]
DEBUG:    % sending keepalive ping
DEBUG:    > PING 81 e2 c2 99 [binary, 4 bytes]
DEBUG:    < PONG 81 e2 c2 99 [binary, 4 bytes]
DEBUG:    % received keepalive pong
DEBUG:    > TEXT '{"id": "db926495-f85d-40cf-a901-bf92cb953ee7", ...zes the importance of"}' [613 bytes]
DEBUG:    > TEXT '{"id": "db926495-f85d-40cf-a901-bf92cb953ee7", ...d solace in embracing"}' [1249 bytes]
DEBUG:    > TEXT '{"id": "db926495-f85d-40cf-a901-bf92cb953ee7", ...at shape their lives."}' [1908 bytes]
DEBUG:    % sending keepalive ping
这只是一个小的本地示例,但我希望它能向您展示在跨平台移动应用程序中添加人工智能聊天功能有多么简单,并为您提供一些基本的构建模块,以便为您的用户创建出色的体验!
作者:Deon Pillsbury
原文:https://dev.to/dpills/aitomobile-build-an-ai-powered-mobile-app-2lod
本文来自作者投稿,版权归原作者所有。如需转载,请注明出处:https://www.nxrte.com/jishu/45182.html