
不久前,我承担了从运行Android的设备的前后摄像头获取同步提要的任务。 像往常一样,我去了Stack Overflow,然后去了GitHub,然后去了其他博客,才意识到我可能独自一人。 难过的感觉吧?

在能够解决问题之后,我花了一些时间来帮助可能会陷入同样困境的人们。
我已经为本教程制作了一个示例应用程序。本教程中共享的所有代码段均来自应用程序本身。如果您在任何时候都不了解代码段,则可以引用整个合并文件。您可以在GitHub上找到本教程的示例应用程序:
如果您是Android相机的新手,则android / camera-samples存储库将是一个很好的起点。
注意:Java实现已从android / camera-samples中删除。对于Java实现,您可以参考此分叉存储库 。
在本教程中,假定您能够自己实现相机供稿。 如果不是这种情况,请访问上述存储库。 本教程将更加有意义。 否则,您可能会发现自己迷路了。
设置预览视图 (Set Up Views for Preview)
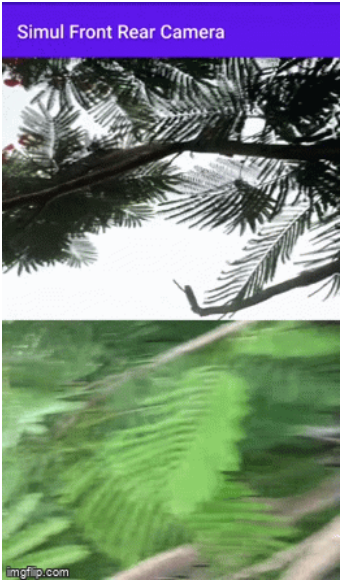
We will require two separate views to present the preview from two cameras. We will start small by creating views to show the previews:
我们将需要两个单独的视图来展示两个摄像机的预览。我们将首先创建视图以显示预览:
<?xml version="1.0" encoding="utf-8"?>
<LinearLayout xmlns:android="http://schemas.android.com/apk/res/android"
    android:orientation="vertical"
    android:layout_width="match_parent"
    android:layout_height="match_parent">


    <!--This is a custom TextureView, generic TextureView can be used as well-->
    <com.ananth.frontrearcamera.view.AutoFitTextureView
        android:layout_weight="1"
        android:id="@+id/texture1"
        android:layout_width="wrap_content"
        android:layout_height="wrap_content" />


    <com.ananth.frontrearcamera.view.AutoFitTextureView
        android:layout_weight="1"
        android:id="@+id/texture2"
        android:layout_width="wrap_content"
        android:layout_height="wrap_content" />


</LinearLayout>
Now, before opening our cameras, we need to make sure both of their TextureViews are available for rendering using TextureView.SurfaceTextureListener.
现在,在打开相机之前,我们需要确保它们的两个TextureViews都可以使用TextureView.SurfaceTextureListener进行渲染。
We will be following a complete separation of concerns. Both TextureViews will have their own listeners. Listeners will open concerned cameras asynchronously without depending on the other. The separation of concerns is to such an extent that even if one camera is not able to show a preview for some reason, the other might function flawlessly.
我们将完全消除关注点。两个TextureViews都有自己的侦听器。侦听器将异步打开相关的摄像机,而不会彼此依赖。关注点分离的程度是,即使一台摄像机由于某种原因无法显示预览,另一台摄像机也可能会正常工作。
The listeners will open their respective camera when the views become available using onSurfaceTextureAvailable(SurfaceTexture, Int, Int):
当使用onSurfaceTextureAvailable(SurfaceTexture, Int, Int)提供视图时,侦听器将打开各自的摄像头:
private val surfaceTextureListenerFront = object : TextureView.SurfaceTextureListener {
        override fun onSurfaceTextureAvailable(texture: SurfaceTexture, width: Int, height: Int) {
            openCameraFront(width, height)
        }
        override fun onSurfaceTextureSizeChanged(texture: SurfaceTexture, width: Int, height: Int) {
            configureTransformFront(width, height)
        }
        override fun onSurfaceTextureDestroyed(texture: SurfaceTexture) = true
        override fun onSurfaceTextureUpdated(texture: SurfaceTexture) = Unit
    }


    private val surfaceTextureListenerRear = object : TextureView.SurfaceTextureListener {
        override fun onSurfaceTextureAvailable(texture: SurfaceTexture, width: Int, height: Int) {
            openCameraRear(width, height)
        }
        override fun onSurfaceTextureSizeChanged(texture: SurfaceTexture, width: Int, height: Int) {
            configureTransformRear(width, height)
        }
        override fun onSurfaceTextureDestroyed(texture: SurfaceTexture) = true
        override fun onSurfaceTextureUpdated(texture: SurfaceTexture) = Unit
    }
打开两个摄像头 (Open Both Cameras)
Our openCameraFront(int, int) and openCameraRear(int, int) functions will set up front and rear camera parameters before actually opening the camera. These parameters are different for different cameras. Therefore, they need to be set separately. What parameters are we talking about? Parameters like:
我们的openCameraFront(int, int)和openCameraRear(int, int)函数将在实际打开相机之前设置前后相机参数。对于不同的相机,这些参数是不同的。因此,它们需要单独设置。我们在说什么参数?参数如下:
- Camera ID 相机编号
- Sensor orientation 传感器方向
- Width and height of the image required from the camera 相机所需图像的宽度和高度
This is achieved in the function below. The code concerning only the front camera is attached (it is similar for the rear camera):
这是通过以下功能实现的。随附仅涉及前置摄像头的代码(对于后置摄像头类似):
/**
     * Sets up member variables related to front camera.
     * @param width  The width of available size for camera preview
     * @param height The height of available size for camera preview
     */
    private fun setUpCameraOutputsFront(width: Int, height: Int) {
        val manager = activity?.getSystemService(Context.CAMERA_SERVICE) as CameraManager
        try {
            for (cameraId in manager.cameraIdList) {
                val characteristics = manager.getCameraCharacteristics(cameraId)


                // We need front facing camera.
                val cameraDirection = characteristics.get(CameraCharacteristics.LENS_FACING)
                if (cameraDirection != null &&
                    cameraDirection == CameraCharacteristics.LENS_FACING_BACK) {
                    continue
                }
                val map = characteristics.get(
                    CameraCharacteristics.SCALER_STREAM_CONFIGURATION_MAP) ?: continue


                // For still image captures, we use the largest available size.
                val aspectRatio = Collections.max(Arrays.asList(*map.getOutputSizes(ImageFormat.JPEG)), CompareSizesByViewAspectRatio(textureViewFront.height, textureViewFront.width))

                imageReaderFront = ImageReader.newInstance(aspectRatio.width, aspectRatio.height, ImageFormat.JPEG, /*maxImages*/ 2).apply {
                    setOnImageAvailableListener(onImageAvailableListenerFront, backgroundHandler)
                }
                // Find out if we need to swap dimension to get the preview size relative to sensor
                // coordinate.
                val displayRotation = activity!!.windowManager.defaultDisplay.rotation


                sensorOrientationFront = characteristics.get(CameraCharacteristics.SENSOR_ORIENTATION)!!
                val swappedDimensions = areDimensionsSwappedFront(displayRotation)


                val displaySize = Point()
                activity!!.windowManager.defaultDisplay.getSize(displaySize)
                val rotatedPreviewWidth = if (swappedDimensions) height else width
                val rotatedPreviewHeight = if (swappedDimensions) width else height
                var maxPreviewWidth = if (swappedDimensions) displaySize.y else displaySize.x
                var maxPreviewHeight = if (swappedDimensions) displaySize.x else displaySize.y


                if (maxPreviewWidth > MAX_PREVIEW_WIDTH) maxPreviewWidth = MAX_PREVIEW_WIDTH
                if (maxPreviewHeight > MAX_PREVIEW_HEIGHT) maxPreviewHeight = MAX_PREVIEW_HEIGHT


                previewSizeFront = chooseOptimalSize(map.getOutputSizes(SurfaceTexture::class.java),
                    rotatedPreviewWidth, rotatedPreviewHeight,
                    maxPreviewWidth, maxPreviewHeight,
                    aspectRatio)


                this.cameraIdFront = cameraId
                // We've found a viable camera and finished setting up member variables,
                // so we don't need to iterate through other available cameras.
                return
            }
        } catch (e: CameraAccessException) {
            Log.e(TAG, e.toString())
        } catch (e: NullPointerException) {
            // Currently an NPE is thrown when the Camera2API is used but not supported on the
            // device this code runs.
            ErrorDialog.newInstance(getString(R.string.camera_error))
                .show(childFragmentManager, FRAGMENT_DIALOG)
        }
    }
Now that we have set up our parameters for the front and rear cameras, we are set to open both of them.
现在我们已经设置了前置摄像头和后置摄像头的参数,现在可以将它们都打开。
private fun openCameraFront(width: Int, height: Int) {
        setUpCameraOutputsFront(width, height)
        configureTransformFront(width, height)
        val manager = activity?.getSystemService(Context.CAMERA_SERVICE) as CameraManager
        try {
            manager.openCamera(cameraIdFront, stateCallbackFront, backgroundHandler)
        } catch (e: CameraAccessException) {
            Log.e(TAG, e.toString())
        }
    }


    private fun openCameraRear(width: Int, height: Int) {
        setUpCameraOutputsRear(width, height)
        configureTransformRear(width, height)
        val manager = activity?.getSystemService(Context.CAMERA_SERVICE) as CameraManager
        try {
            manager.openCamera(cameraIdRear, stateCallbackRear, backgroundHandler)
        } catch (e: CameraAccessException) {
            Log.e(TAG, e.toString())
        }
    }
Opening the camera is an asynchronous process. The success or failure is reported and handled using CameraDevice.StateCallback, which is passed as an argument while opening the camera and is not nullable.
打开相机是一个异步过程。使用CameraDevice.StateCallback报告和处理成功或失败,它在打开相机时作为参数传递,并且不能为空。
Make sure that the camera’s permissions are given to the application and no other higher-priority application is using any of the camera. Otherwise, the camera-opening request will fail. This will be reported by throwing a CameraAccessException in the CameraDevice.StateCallback#onError by the respective camera device.
确保已将相机的权限授予该应用程序,并且没有其他更高优先级的应用程序在使用任何相机。否则,打开摄像机的请求将失败。这将通过由相应的相机设备在CameraDevice.StateCallback#onError中抛出CameraAccessException来报告。
At this point, the device will attempt to open both cameras simultaneously. If we get the CameraDevice.StateCallback#onOpened callback for both cameras, we have successfully opened them. We can check the success or failure using logs and can debug in case of any challenges. For reference, this is how I have implemented CameraDevice.StateCallback for the front camera in this project (it is similar for the rear camera):
此时,设备将尝试同时打开两个摄像机。如果我们同时获得两个摄像机的CameraDevice.StateCallback#onOpened回调,则我们已成功打开它们。我们可以使用日志检查成功或失败,并可以在遇到任何挑战时进行调试。供参考,这是我实现CameraDevice.StateCallback 该项目中的前置摄像头(与后置摄像头类似):
private val stateCallbackFront = object : CameraDevice.StateCallback() {
  override fun onOpened(cameraDevice: CameraDevice) {
    this@CameraFragment.cameraDeviceFront = cameraDevie
    createCameraPreviewSessionFront()
  }
override fun onDisconnected(cameraDevice: CameraDevice) {
  cameraDevice.close()
  this@CameraFragment.cameraDeviceFront = null
  }
override fun onError(cameraDevice: CameraDevice, error: Int) {
  onDisconnected(cameraDevice)
  this@CameraFragment.activity?.finish()
  }
}
从两个相机获取预览 (Get Preview From Both Cameras)
We have done most of the heavy lifting. We are only left with directing a feed from the cameras to the respective views. For this, we will have to create a Surface and hand it over to our CameraDevice. Now, according to the Surface, CameraDevice adjusts its hardware processing pipelines to give outputs at requested sizes.
我们已经完成了大部分繁重的工作。我们仅需将摄影机的提要定向到各个视图。为此,我们将必须创建一个Surface并将其移交给我们的CameraDevice 。现在,根据Surface,CameraDevice调整其硬件处理管道以提供所需大小的输出。
Since we only need to get previews from the cameras for now, our TextureViews will serve as our Surfaces. We will be creating a CameraCaptureSession for both the front and rear cameras separately, passing respective Surfaces to get a preview:
由于我们现在仅需要从摄像机获取预览,因此我们的TextureViews将用作Surface。我们将分别为前置和后置摄像头创建一个CameraCaptureSession,并传递各自的Surface以获得预览:
private fun createCameraPreviewSessionFront() {
  try {
    val texture = textureViewFront.surfaceTexture


    texture.setDefaultBufferSize(previewSizeFront.width, previewSizeFront.height)
    val surface = Surface(texture)
    previewRequestBuilderFront = cameraDeviceFront!!.createCaptureRequest(CameraDevice.TEMPLATE_PREVIEW)
    previewRequestBuilderFront.addTarget(surface)


    // Here, we create a CameraCaptureSession for camera preview.
    cameraDeviceFront?.createCaptureSession(Arrays.asList(surface, imageReaderFront?.surface), object : CameraCaptureSession.StateCallback() {
      override fun onConfigured(cameraCaptureSession: CameraCaptureSession) {
                        // The camera is already closed
        if (cameraDeviceFront == null) return
        // When the session is ready, we start displaying the preview.
        captureSessionFront = cameraCaptureSession
        try {
          // Auto focus should be continuous for camera preview.
          previewRequestBuilderFront.set(CaptureRequest.CONTROL_AF_MODE, CaptureRequest.CONTROL_AF_MODE_CONTINUOUS_PICTURE)
          // Finally, we start displaying the camera preview.
          previewRequestFront = previewRequestBuilderFront.build()
          captureSessionFront?.setRepeatingRequest(previewRequestFront, captureCallback, backgroundHandler)
        } catch (e: CameraAccessException) {
          Log.e(TAG, e.toString())
        }
      }
      override fun onConfigureFailed(session: CameraCaptureSession) {
      }
    }, null)
  } catch (e: CameraAccessException) {
    Log.e(TAG, e.toString())
  }
}
That’s all. You can visit CameraFragment.kt to see all this consolidated working code. The Camera2 API is like a DSLR if the Camera API was a point-and-shoot camera. It might seem overwhelming, but its beauty is the fine controls it provides over the camera feed.
就这样。您可以访问CameraFragment.kt来查看所有这些合并的工作代码。如果Camera API是傻瓜相机,则Camera2 API就像DSLR。它看起来似乎不知所措,但是它的优点在于它可以很好地控制摄像机的提要。
结论 (Conclusion)
如果您了解Camera2的复杂性,他们可以弄清楚如何在策略上同时使用两台摄像机。 我鼓励您继续尝试一键同时从两个摄像机捕获图像。
如果您有任何建议,反馈或问题,我希望收到您的来信。
源码链接:https://github.com/ananthrajsingh/front-rear-simultaneous-camera
— END —
进技术交流群,扫码添加我的微信:Byte-Flow

本文来自作者投稿,版权归原作者所有。如需转载,请注明出处:https://www.nxrte.com/jishu/2566.html