
书接前文,我们使用NDK交叉编译了FFMpeg6.0,同时使用FFMpeg6.0实现了MediaCodec的硬解码,既可以解码为NV12数据也可以直接解码到Surface上, 今天我们就使用FFMpeg6.0调用MediaCodec实现硬编码。
今天我们需要实现的一个小需求就是将FFmpeg6.0调用MediaCodec解码一文当中解码出来的NV12数据通过FFMpeg6.0的MediaCodec硬编码为H265视频。
寻找H265的编码器
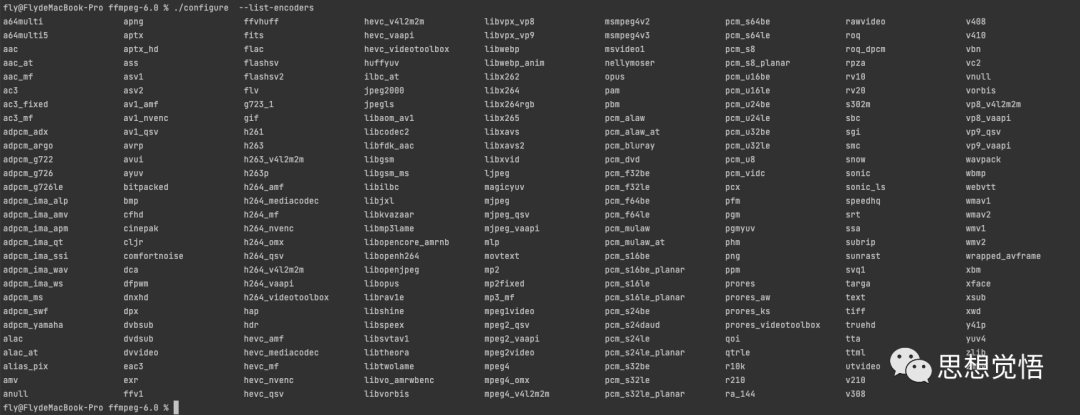
老套路,我们先来看看FFMpeg6.0支持哪些编码器,直接./configure --list-encoders走起,

依然是输出太多了,我们过滤一下重点信息,./configure --list-encoders |grep mediacodec再走起

图中框出的hevc_mediacodec就是我们所需要的H265编码器。
FFMpeg的MediaCodec硬编码实现
找到了编码器的名称,其他的事情就好办了,这个编码流程大概是一下几个步骤:
- 初始化编码器
首先通过APIavcodec_find_encoder_by_name查找到对应的编码器,然后使用avcodec_alloc_context3分配下编码器上下文结构体,再顺便配置下编码的相关信息, 例如输入图像的格式、编码帧率、比特率、图像宽高等等,最后使用avcodec_open2打开编码器即可。
- 初始化输出流
这一步首先通过av_guess_format获取到输出流的格式结构体,这个函数会根据你的输出文件后缀名确定封装格式。然后通过函数avformat_new_stream构建一个输出轨道, 比如一个视频有视频轨道和音频轨道,则是多次需要使用avformat_new_stream构建多个输出轨道。
轨道流构建好之后通过函数avcodec_parameters_from_context将前面的编码器上下文与轨道的编码器上下文进行关联,最后通过avio_open打开输出流即可。
- 读取YUV数据送入编码
在这里必须明确你所使用的YUV图像是什么格式的,不同格式的读取方式略有不同,比如都是yuv420p的图像NV12的读取方式与i420的读取就不同,其中NV12是两个平面的, 而i420则是三个平面的。
其中i420的读取可以参考下笔者之前的文章其中FFmpeg音视频编码
读取到YUV数据后,通过APIavcodec_send_frame将数据帧送入编码器进行编码即可。
- 从编码器中获取已编码的数据
这个步骤使用avcodec_receive_packet即可获取到解码后的数据包。需要注意的是函数avcodec_send_frame与avcodec_receive_packet并不是一一对应的, 一个avcodec_receive_packet可能会对应多个avcodec_receive_packet,因此,在使用avcodec_receive_packet需要一个循环获取。这是因为编码器内部需要 对编码数据进行缓存计算编码,并不是说一个输入帧就对应一个输出包,可能是好几个输入帧才有一个输出包,又或者是好几个输入帧才编码出好几个编码输出包。
- 将编码好的数据写入封装文件中
在这一步将avcodec_receive_packet获取到的编码数据包赋值前面的输出流索引,然后在修正i啊pts,就可以通过av_write_frame将数据包写入到封装文件中去了, 然后别忘记了调用av_packet_unref将数据包的引用删除,待所有的编码数据包写入完毕后,在调用av_write_trailer写入文件尾,那么一个简单的视频文件就构造完毕啦…
完整代码如下:
void FFEncoder::encodeYUV(const char *yuvPath, const char *videoOut) {
    const AVCodec *avCodec = avcodec_find_encoder_by_name("hevc_mediacodec");
    if (nullptr == avCodec) {
        LOGD_E("FFEncoder", "没有找到hevc_mediacodec编码器");
        return;
    }

    AVCodecContext *avCodecContext = nullptr;
    AVFormatContext *out_format_context = nullptr;
    AVPacket *avPacket{nullptr};
    AVFrame *avFrame{nullptr};
    FILE *input_media{nullptr};
    int ret = 0;
    do {
        avCodecContext = avcodec_alloc_context3(avCodec);
        avCodecContext->time_base = {1, 25};
        // 这些宽高不要写死,笔者的测试数据刚好是1080X1920而已
        avCodecContext->width = 1080;
        avCodecContext->height = 1920;
        avCodecContext->bit_rate = 2000000;
        avCodecContext->profile = FF_PROFILE_H264_MAIN;
//        avCodecContext->gop_size = 10;
        avCodecContext->time_base = {1, 25};
        avCodecContext->framerate = {25, 1};
        // b帧的数量
        avCodecContext->max_b_frames = 0;
        // 自己明确知道自己输入的数据帧是什么格式的
        avCodecContext->pix_fmt = AV_PIX_FMT_NV12;
        // 视频编码器
        avCodecContext->codec_type = AVMEDIA_TYPE_VIDEO;
        // 打开编码器
        ret = avcodec_open2(avCodecContext, avCodec, nullptr);
        if (ret != 0) {
            LOGD_E("FFEncoder", "编码器打开失败:");
            break;
        }
        // 创建输出
        out_format_context = avformat_alloc_context();
        const AVOutputFormat *avOutputFormat = av_guess_format(nullptr, videoOut, nullptr);
        out_format_context->oformat = avOutputFormat;

        AVStream *video_stream = avformat_new_stream(out_format_context, avCodecContext->codec);
        avcodec_parameters_from_context(video_stream->codecpar, avCodecContext);
        int out_video_stream_index = video_stream->index;
        ret = avio_open(&out_format_context->pb, videoOut, AVIO_FLAG_WRITE);
        if (ret < 0) {
            LOGD_E("FFEncoder", "输出流打开失败");
            break;
        }
        ret = avformat_write_header(out_format_context, nullptr);
        if (ret < 0) {
            LOGD_E("FFEncoder", "文件头写入失败");
            break;
        }
        avPacket = av_packet_alloc();
        avFrame = av_frame_alloc();
        avFrame->width = avCodecContext->width;
        avFrame->height = avCodecContext->height;
        avFrame->format = avCodecContext->pix_fmt;
        // 为frame分配buffer
        av_frame_get_buffer(avFrame, 0);
        av_frame_make_writable(avFrame);
        // 打开输入文件
        input_media = fopen(yuvPath, "r");
        if (nullptr == input_media) {
            LOGD_E("FFEncoder", "输入文件打开失败");
            break;
        }
        int pts = 0;
        LOGD_D("FFEncoder", "avFrame->width:%d,avFrame->linesize[0]:%d", avFrame->width,
               avFrame->linesize[0]);
        while (!feof(input_media)) {
            // 需要对YUV分量进行逐行读取
            for (int j = 0; j < avFrame->height; j++)
                // 读取y数据
                fread(avFrame->data[0] + j * avFrame->linesize[0], 1, avFrame->width,
                      input_media);
            // 读取uv
            for (int j = 0; j < avFrame->height / 2; j++)
                fread(avFrame->data[1] + j * avFrame->linesize[1], 1, avFrame->width,
                      input_media);
            // 按帧率计算的pts
            pts += (1000000 / 25);
            avFrame->pts = pts;
            int ret = avcodec_send_frame(avCodecContext, avFrame);
            if (ret < 0) {
                LOGD_E("FFEncoder", "yuv发送编码失败:%s", av_err2str(ret));
                break;
            }
            // 获取编码数据
            while (true) {
                ret = avcodec_receive_packet(avCodecContext, avPacket);
                if (ret == AVERROR(EAGAIN) || ret == AVERROR_EOF) {
                    LOGD_E("FFEncoder", "没有可获取的编码数据");
                    break;
                }
                LOGD_D("FFEncoder", "写入编码数据包");
                avPacket->stream_index = out_video_stream_index;
                // todo avPacket pts修正
                av_write_frame(out_format_context, avPacket);
                av_packet_unref(avPacket);
            }
        }
        // 放入空包,冲刷解码器
        LOGD_D("FFEncoder", "放入空包冲刷编码器");
        avcodec_send_frame(avCodecContext, nullptr);
        while (true) {
            ret = avcodec_receive_packet(avCodecContext, avPacket);
            if (ret == AVERROR(EAGAIN) || ret == AVERROR_EOF) {
                LOGD_E("FFEncoder", "没有可获取的编码数据");
                break;
            }
            LOGD_D("FFEncoder", "写入编码数据包");
            avPacket->stream_index = out_video_stream_index;
            // todo avPacket pts修正
            av_write_frame(out_format_context, avPacket);
            av_packet_unref(avPacket);
        }
    } while (0);
    // 写入文件尾
    ret = av_write_trailer(out_format_context);
    if (ret != 0) {
        LOGD_E("FFEncoder", "文件尾写入失败");
    } else {
        LOGD_E("FFEncoder", "文件尾写入成功");
    }
    // todo 资源释放
    LOGD_D("FFEncoder", "编码执行完毕");
}
上面的代码例子笔者的测试资源就是NV12的YUV裸数据,同时也是明确知道图像的大小是1080X1920的,因此YUV的读取是针对NV12的,在实际的开发过程中,大家需要自行了解微调, 最后本着谁开发谁保护的原则,一定不要忘记资源释放…
关注我,一起进步,有全量音视频开发进阶路径、资料、踩坑记等你来学习…

本文来自作者投稿,版权归原作者所有。如需转载,请注明出处:https://www.nxrte.com/jishu/32277.html