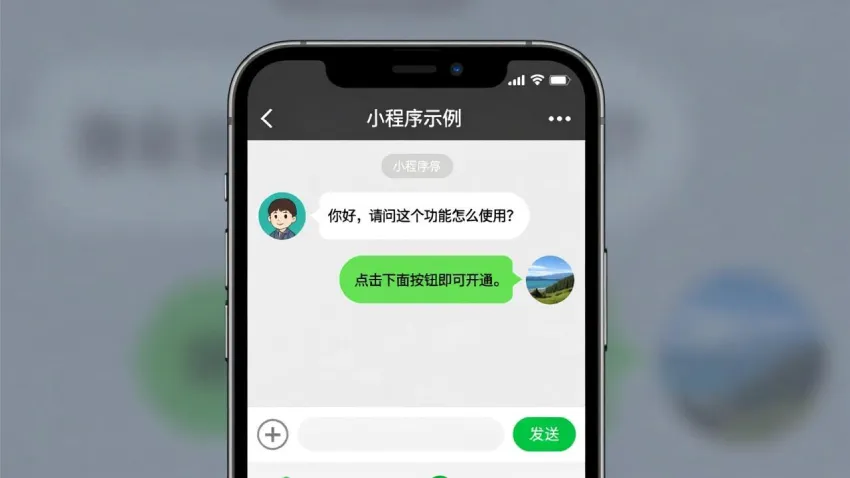
微信小程序本身不带即时通讯能力。要做im聊天,一般自己搭 WebSocket 和接第三方 IM 云服务。本文介绍的是接第三方 IM 云服务,用 ZEGO 的 ZIM(ZEGO 即时通讯 SDK)实现聊天功能。原因有两个:单聊、群聊、聊天室三套模型都在同一套 SDK 里,产品要扩不用换供应商;另外有免费额度,做验证和小规模上线不必先走商务流程。
接下来带您做出一个能用的单聊示例:登录、会话列表、发文本、收消息、翻历史、发图片语音和文件。

第一步:准备工作
1.1 开通 ZIM 服务
登录ZEGO 控制台创建项目,然后做两件事:
- 拿到 AppID(数字)和 ServerSecret(32 字节字符串)
- 到“项目管理 → 即时通讯”手动开通 ZIM 服务
第二步别跳过。ZIM 不是默认开通的,不开通的话后面 create 和 login 会失败。
ServerSecret 只放服务端,不要写进小程序代码。
1.2 配置小程序服务器域名
ZEGO 的部分服务地址不在小程序默认白名单里,必须手动添加。
去微信公众平台 →「开发 → 开发设置 → 服务器域名」,把 ZEGO 要求的域名分别填进 socket 合法域名、request 合法域名、uploadFile 合法域名、downloadFile 合法域名 四个分类。
完整的域名清单看这里:跑通示例源码 – 前提条件。
注意清单是按 SDK 大版本分组的,装哪个版本就配哪一组。
真机调试时可以先跳过校验:开发者工具里点「开发调试 → 打开调试」,再重启小程序。但体验版和正式版没这个开关,上线前必须配全。
1.3 规划一下包体积
小程序主包上限 2MB,ZIM SDK 会占掉一部分。主包剩余低于 800KB 就上分包,别等构建报错再改目录结构。
实用做法:把聊天页和 ZIM SDK 一起放进一个独立分包,主包只留入口和会话列表。参考微信小程序分包加载。
1.4 服务端签发 Token
ZIM 用 Token 鉴权,链路是这样:
小程序                    你的服务端                ZEGO 服务端
  │                          │                        │
  ├─ 请求 token(userID) ────>│                        │
  │                          ├─ 用 ServerSecret 签发  │
  │<──── 返回 token ─────────┤                        │
  │                                                   │
  ├─ login(userID, token) ──────────────────────────> │
  │<───────────────────── 校验通过 ───────────────────┤
在你的服务端新建 token.js:
import { createCipheriv, randomBytes } from 'crypto';

export function generateToken04(appId, userId, secret, effectiveTimeInSeconds, payload = '') {
  if (secret.length !== 32) throw new Error('ServerSecret 必须是 32 字节字符串');

  const createTime = Math.floor(Date.now() / 1000);
  const tokenInfo = {
    app_id: appId,
    user_id: userId,
    nonce: Math.floor(Math.random() * 2147483647),
    ctime: createTime,
    expire: createTime + effectiveTimeInSeconds,
    payload,
  };

  // AES-256-GCM 加密
  const nonce = randomBytes(12);
  const cipher = createCipheriv('aes-256-gcm', secret, nonce);
  const encrypted = cipher.update(JSON.stringify(tokenInfo), 'utf8');
  const encryptBuf = Buffer.concat([encrypted, cipher.final(), cipher.getAuthTag()]);

  // 按协议拼装:[expire 8B][nonce 长度 2B][nonce][密文长度 2B][密文][加密模式 1B]
  const expireBuf = Buffer.alloc(8);
  expireBuf.writeBigInt64BE(BigInt(tokenInfo.expire));

  const nonceLenBuf = Buffer.alloc(2);
  nonceLenBuf.writeUInt16BE(nonce.length);

  const cipherLenBuf = Buffer.alloc(2);
  cipherLenBuf.writeUInt16BE(encryptBuf.length);

  const modeBuf = Buffer.from([1]); // 1 = GCM

  const buf = Buffer.concat([expireBuf, nonceLenBuf, nonce, cipherLenBuf, encryptBuf, modeBuf]);
  return '04' + buf.toString('base64');
}
再暴露一个接口:
import express from 'express';
import { generateToken04 } from './token.js';

const app = express();

app.get('/api/zim/token', (req, res) => {
  const { userId } = req.query;
  if (!userId) return res.status(400).send('missing userId');

  try {
    const token = generateToken04(
      Number(process.env.ZEGO_APP_ID),
      userId,
      process.env.ZEGO_SERVER_SECRET,
      3600
    );
    res.type('text/plain').send(token);
  } catch (err) {
    console.error('[token]', err);
    res.status(500).send('token generation failed');
  }
});
第二步:集成 SDK 并初始化
2.1 安装
npm i zego-zim-miniprogram装完在微信开发者工具里点「工具 → 构建 npm」,否则 import 会报找不到模块。
2.2 封装单例
不要在每个页面里各调一次 ZIM.create。SDK 只允许创建一个实例,第二次调用返回 null,你会拿到一堆空指针。
新建 utils/zim.ts:
import { ZIM, ZIMAppConfig } from 'zego-zim-miniprogram';

const appConfig: ZIMAppConfig = {
  appID: 12345678, // 换成你的 AppID,Token 鉴权不需要 appSign
};

let zimInstance: ZIM | null = null;

export function getZim(): ZIM {
  if (zimInstance) return zimInstance;

  const zim = ZIM.create(appConfig);
  zimInstance = zim || (ZIM.getInstance() as ZIM);
  return zimInstance;
}
ZIM.getInstance() 用来兜底处理”实例已经被别处创建过”的情况。
2.3 注册事件监听
这一步必须在 login 之前做。SDK 登录后会立刻回调几条状态通知,监听注册晚了就收不到。
继续在 utils/zim.ts 里加:
import { ZIMEventHandler } from 'zego-zim-miniprogram';

// 按事件类型注册,用不到的就不注册
export function initZimEvents(handler: Partial<ZIMEventHandler>) {
  const zim = getZim();

  if (handler.connectionStateChanged) {
    zim.on('connectionStateChanged', handler.connectionStateChanged);
  }
  if (handler.conversationSyncStateChanged) {
    zim.on('conversationSyncStateChanged', handler.conversationSyncStateChanged);
  }
  if (handler.messageReceived) {
    zim.on('messageReceived', handler.messageReceived);
  }
  if (handler.conversationChanged) {
    zim.on('conversationChanged', handler.conversationChanged);
  }
  if (handler.conversationTotalUnreadMessageCountUpdated) {
    zim.on(
      'conversationTotalUnreadMessageCountUpdated',
      handler.conversationTotalUnreadMessageCountUpdated
    );
  }

  zim.on('error', (zim, errorInfo) => {
    console.error('[ZIM] error', errorInfo.code, errorInfo.message);
  });
}
事件用 zim.on(type, listener) 注册、zim.off(type) 移除,同一事件类型重复注册会覆盖上一次的回调。这 5 个回调分工不同,别混用:
| 回调 | 负责什么 |
|---|---|
connectionStateChanged | 断线重连,顶部提示条 |
conversationSyncStateChanged | 会话列表什么时候可以查 |
messageReceived | 聊天页追加新消息 |
conversationChanged | 会话列表排序与未读数 |
conversationTotalUnreadMessageCountUpdated | tab 角标 |
第三步:登录
import { ZIMLoginConfig, ZIMError } from 'zego-zim-miniprogram';

export async function loginZim(userID: string, userName: string) {
  const zim = getZim();

  // 1. 从自己的服务端取 Token
  const res = await wx.request({
    url: 'https://your-server.com/api/zim/token',
    data: { userId: userID },
  });

  // 2. 登录
  const config: ZIMLoginConfig = {
    userName,
    token: res.data as string,
    isOfflineLogin: false,
  };

  try {
    await zim.login(userID, config);
    console.log('[ZIM] login success');
  } catch (err) {
    const error = err as ZIMError;
    console.error('[ZIM] login failed', error.code, error.message);
    throw err;
  }
}
userID 有字符集限制:最长 32 字节,只允许数字、英文字母和 ! # $ % & ( ) + - : ; < = . > ? @ [ ] ^ _ { } | ~。用 OpenID 或自增 ID 都行,别直接用手机号。
到这一步先跑一次:调用 loginZim('test1', '测试用户'),控制台看到 login success 再往下走。如果失败,先回头确认 1.1 的服务开通和 1.4 的 Token 是否正常。
第四步:做会话列表
先做列表再做聊天页。列表是入口,聊天页从列表点进去,这个顺序能少走回头路。
4.1 什么时候查列表
登录成功后不要立刻 queryConversationList。此时 SDK 正在从服务端同步会话数据,你查到的可能是空数组或上一轮的旧数据。
等同步完成的回调:
// pages/conversation/index.ts
import { ZIMMessage, ZIMTextMessage } from 'zego-zim-miniprogram';

Page({
  data: { conversations: [], syncing: true },
  seenMessageIds: new Set<string>(),

  onLoad() {
    initZimEvents({
      conversationSyncStateChanged: (zim, result) => {
        // state: 0 = Started, 1 = Finished, 2 = Failed
        if (result.state === 1) {
          this.setData({ syncing: false });
          this.loadConversations();
        } else if (result.state === 0) {
          this.setData({ syncing: true });
        }
      },

      conversationChanged: () => this.loadConversations(),

      conversationTotalUnreadMessageCountUpdated: (zim, result) => {
        const count = result.totalUnreadMessageCount;
        if (count === 0) {
          wx.removeTabBarBadge({ index: 0 });
        } else {
          wx.setTabBarBadge({ index: 0, text: count > 99 ? '99+' : String(count) });
        }
      },
    });
  },

  async loadConversations() {
    // 首页不传 nextConversation
    const res = await getZim().queryConversationList({ count: 50 });

    this.setData({
      conversations: res.conversationList.map((conv) => ({
        conversationID: conv.conversationID,
        name: conv.conversationName || conv.conversationID,
        avatar: conv.conversationAvatarUrl,
        lastMessage: previewText(conv.lastMessage),
        unread: conv.unreadMessageCount,
        time: conv.lastMessage?.timestamp ?? 0,
      })),
    });
  },
});

// lastMessage 是 ZIMMessage,只有文本消息才有 message 字段,取值前按 type 收窄
function previewText(msg?: ZIMMessage): string {
  if (!msg) return '';
  return msg.type === 1 ? (msg as ZIMTextMessage).message : '[非文本消息]';
}
返回的 conversationList 已按置顶 > 最后消息时间排好序,前端不用再排。
4.2 分页
nextConversation 是游标:首次不传,后续传上一页返回的最后一条会话对象。
const page1 = await zim.queryConversationList({ count: 20 });

const page2 = await zim.queryConversationList({
  nextConversation: page1.conversationList[page1.conversationList.length - 1],
  count: 20,
});
4.3 未读数
未读数分三层,理清就好办:
| 层级 | 数据来源 | 用在哪 |
|---|---|---|
| 单会话未读 | conversation.unreadMessageCount | 列表每行的红点 |
| 总未读 | conversationTotalUnreadMessageCountUpdated | tab 角标 |
| 清除 | clearConversationUnreadMessageCount | 进入聊天页时 |
进入聊天页时清一次:
onLoad(options) {
  const { conversationID } = options; // 单聊的 conversationID 就是对方 userID
  getZim().clearConversationUnreadMessageCount(conversationID, 0); // 0 = Peer
}
用户停留在聊天页期间,每收到一条新消息也要再清一次,否则未读数会一直累加。
第五步:发送消息
5.1 发送文本
import { ZIMMessageSendConfig } from 'zego-zim-miniprogram';

export async function sendText(toUserID: string, text: string) {
  if (!text.trim()) return; // SDK 不允许空消息,会返回 6000001

  // 消息对象用对象字面量,type = 1 表示文本消息
  const message = { type: 1, message: text };

  const config: ZIMMessageSendConfig = { priority: 1 }; // 1=Low(默认), 2=Medium, 3=High

  const notification = {
    // 消息已落本地库,可以拿到 messageID,用于乐观 UI
    onMessageAttached: (msg) => {
      console.log('[ZIM] attached', msg.messageID);
    },
  };

  const result = await getZim().sendMessage(
    message,
    toUserID, // 单聊时就是对方 userID
    0,        // 0 = Peer(单聊)
    config,
    notification
  );

  return result.message;
}
onMessageAttached 和 Promise resolve 是两个不同时刻:前者是消息已写入本地数据库,后者是服务端确认收到。乐观 UI 就靠这个时间差:
async function sendWithOptimisticUI(toUserID: string, text: string) {
  const message = { type: 1, message: text };

  let localId = '';

  const promise = getZim().sendMessage(
    message,
    toUserID,
    0,
    { priority: 1 },
    {
      onMessageAttached: (msg) => {
        localId = msg.messageID;
        this.appendMessage({ messageID: localId, text, status: 'sending' });
      },
    }
  );

  try {
    await promise;
    this.updateStatus(localId, 'sent');
  } catch {
    this.updateStatus(localId, 'failed');
  }
}
5.2 发送失败怎么重发
把原消息对象重新传进去,config.isRetrySend 设为 true:
const retryConfig: ZIMMessageSendConfig = { priority: 1, isRetrySend: true };
await zim.sendMessage(failedMessage, toUserID, 0, retryConfig);
如果 SDK 正在自动重发,你同时手动重发会报参数错误。所以失败态按钮要判断一下当前连接状态,别让用户狂点。
第六步:接收消息
initZimEvents({
  messageReceived: (zim, result) => {
    const { messageList, receivedInfo } = result;
    const { conversationID, conversationType } = receivedInfo;

    if (conversationType !== 0) return; // 只处理单聊

    messageList.forEach((msg) => {
      // 1. 去重:同一 messageID 只处理一次
      if (this.seenMessageIds.has(msg.messageID)) return;
      this.seenMessageIds.add(msg.messageID);

      // 2. 当前就在这个会话的聊天页,直接追加
      if (this.currentConversationID === conversationID) {
        this.appendMessage(msg);
        // 3. 同时清未读,否则会一直涨
        zim.clearConversationUnreadMessageCount(conversationID, 0);
      }
    });
  },
});
去重是必须的。弱网重连、多端登录、手动重发都可能导致同一条消息被回调两次,不去重就会出现重复气泡。
还有一个容易踩的坑:多端登录时,另一台设备发的消息不触发 messageReceived,只触发 conversationChanged。所以会话列表要同时监听这两个回调,否则 PC 端发的消息在手机列表里看不到。
第七步:拉取历史消息
import { ZIMMessageQueryConfig } from 'zego-zim-miniprogram';

async function loadHistory(conversationID: string, anchor?: ZIMMessage) {
  const config: ZIMMessageQueryConfig = {
    nextMessage: anchor, // 首次不传
    count: 30,
    reverse: true,       // true = 从新往旧查
    mode: 0,             // 0 = General,SDK 自己决定查本地还是回源服务端
  };

  const res = await getZim().queryHistoryMessage(conversationID, 0, config);
  return res.messageList;
}
分页时注意游标方向:reverse: true 是”往前翻”,游标要传当前已加载列表的第一条(最早那条),不是最后一条。
async loadMore() {
  const oldest = this.data.messages[0];
  const list = await loadHistory(this.data.conversationID, oldest);
  this.setData({ messages: [...list, ...this.data.messages] });
}
进入会话页时直接调一次 queryHistoryMessage 就行——SDK 内部会优先查本地数据库,本地不完整时自动回源服务端,不需要你手动分层。
第八步:发图片、语音和文件
媒体消息对象可以直接用对象字面量构造,靠 type 区分:
| 类型 | type | 额外必填字段 |
|---|---|---|
| 图片 | 11 | 无 |
| 文件 | 12 | 无 |
| 音频 | 13 | audioDuration(秒) |
| 视频 | 14 | videoDuration(秒) |
8.1 图片
function sendImage(toUserID: string, filePath: string) {
  const imageMessage = { fileLocalPath: filePath, type: 11 };

  const notification = {
    onMediaUploadingProgress: (message, currentFileSize, totalFileSize) => {
      const percent = Math.floor((currentFileSize / totalFileSize) * 100);
      this.setData({ uploadPercent: percent });
    },
  };

  return getZim().sendMessage(imageMessage, toUserID, 0, { priority: 1 }, notification);
}

wx.chooseMedia({
  count: 1,
  mediaType: ['image'],
  success(res) {
    sendImage(toUserID, res.tempFiles[0].tempFilePath);
  },
});
图片和视频建议先压缩再发。SDK 3.2.0 起图片上限 20MB,但 20MB 是上限不是目标——手机原图动辄 8~15MB,直接发对方要加载很久:
wx.compressImage({
  src: tempFilePath,
  quality: 70,
  success(res) {
    sendImage(toUserID, res.tempFilePath);
  },
});
8.2 语音
function sendAudio(toUserID: string, filePath: string, duration: number) {
  const audioMessage = {
    fileLocalPath: filePath,
    type: 13,
    audioDuration: duration, // 必填,不填会导致发送失败
  };
  return getZim().sendMessage(audioMessage, toUserID, 0, { priority: 1 });
}

const recorder = wx.getRecorderManager();
recorder.start({ format: 'mp3', duration: 60000 });

recorder.onStop((res) => {
  // res.duration 是毫秒,SDK 要秒
  sendAudio(toUserID, res.tempFilePath, Math.round(res.duration / 1000));
});
录音前要处理 scope.record 授权。用户拒绝后要引导去设置页开启,否则 recorder.start() 会静默失败,你会以为是自己代码的问题。
8.3 文件
从微信聊天记录里选:
wx.chooseMessageFile({
  count: 1,
  success(res) {
    const fileMessage = { fileLocalPath: res.tempFiles[0].path, type: 12 };
    getZim().sendMessage(fileMessage, toUserID, 0, { priority: 1 });
  },
});
8.4 接收方怎么显示
对方收到的媒体消息没有本地文件,只有一个 fileDownloadUrl。小程序端不需要下载到本地:
<image src="{{msg.fileDownloadUrl}}" mode="widthFix" />
语音、视频同理,audio、video 直接把这个 URL 填进 src 就能播放。文件消息需要落盘,走 wx.downloadFile 再 wx.openDocument。
fileDownloadUrl 由 ZEGO 服务器生成,发送方在发送成功的回调里也能拿到这个字段——哪怕发送方本地原图删了,双方仍然能用它重新下载。
小结
到这里,一个能用的单聊就跑通了。回顾一下几个关键点:
- ZIM 服务要在控制台手动开通
- 服务器域名按 SDK 版本配齐,升级 SDK 后回来核对
- Token 在服务端签发,ServerSecret 不进小程序
- 事件监听要在 login 之前注册
- 会话列表要等同步完成再查
- 接收消息必须去重
在 Demo 基础上继续往下做,群聊只需要把 conversationType 传 2,其余流程完全一致。消息撤回、已读回执、敏感词审核 ZIM 也都有对应接口,按上面的模式套即可。
参考资料
版权声明:本文内容转自互联网,本文观点仅代表作者本人。本站仅提供信息存储空间服务,所有权归原作者所有。如发现本站有涉嫌抄袭侵权/违法违规的内容, 请发送邮件至1393616908@qq.com 举报,一经查实,本站将立刻删除。

